Showing posts with label Sewing. Show all posts

Saturday, August 16, 2014

A Lovely Sunny Dress (Review)


Another designer I recently was 
given the opportunity to test for was Veronica of SewVery..

 The woman behind SewVery patterns and the SewVery Blog. 
She is just so sweet and a talented sewist. 
You should really check out her recent finish of  Radiant home studio's retro rucksack. I love the colors Veronica used! 
I actually won this pattern a while back and it is still hanging out it my to-do pile:) 

Any-who back to the Sunny Dress and Top pattern review.
This pattern includes a cute tie back and two neck options and two lengths.
 One neck option is your basic rounded neckline and the other includes a ruffled neck. 
Your two lengths available in this pattern is a regular top and a dress length. 


For my first run testing of this pattern I sewed up the size 8 for my Niece using view B (no ruffle) in a dress. The dress sewed up so very quick and you could easily sew up 3 or 4 assembly style for school in an afternoon. 


 This dress fits her perfectly; both in size and style. I used some Mr Men fabric from my stash.
 I had justenough fabric for this top and sadly have no more.

My Niece loved this so much I knew I had to sew her up another one. In true me fashion I used another irreplaceable fabric. I got this fabric in an estate sale recently and I just love it so much. I decided that I should stop hoarding these types of fabrics and just make something that can be loved or worn.


On this version I opted to lengthen the top to a tunic length (I went down to the length of a size 5 dress to make a size 8 tunic). I also used some estate sale fabric for the yellow mini polka dot bib and scraps to make a turned tube a ruffle down the center of the bib. Then accented  that with some white rick-rack
 I had laying around and a few buttons.
I really hope to see this on her in the fall with some skinny's, boots and a long sleeved shirt under it!


On adorb overload yet??
If you want to get your own copy of the Sunny Dress/top pattern you should go to the
 SewVery Pattern shop . And I mean like, right now because until
 tomorrow (August 17th) the pattern is 20% off!!

If you would like to try your luck Veronica is graciously giving away 2 copies of the pattern
(also ending tomorrow) I've included the rafflecopter for you.


There are many talented sewists participating in the blog tour and you should totally
 check out all the awesomeness they have cooked up.

Friday, July 4, 2014

The Run Hop Skip Jump Shorts/Pants Pattern Review


  • Hey! As my followers already know, my name is Susan and I blog from just outside Pittsburgh, Pennsylvania. I almost always sew for my little man but occasionally throw in a quilt, gifts or something for myself.


I recently saw in blog land that Stitch it Now was looking for pattern testers for a new pattern for shorts and pants. I knew that I had to get right on that! As I mentioned before, I almost always sew for my little man and there are just not that many patterns out there for boys ((although this one definitely works for girls)) so I had to put my name in quick! Luckily, I was picked and the rest as they say is history.


This pattern has patch pockets on the front and back which give an excellent opportunity for using a different fabric for interest. The pattern also comes in two lengths, shorts and pants, which is great for transitioning a pattern from summer to winter. I also could totally see myself doing a cropped pant (capri for girls) with the tabs on the side for fall/spring too! This pattern also includes a flat front with elastic in the back.


For my version I picked white and red bottom weight. I used the white as the base and wonder under-ed the red stripes to it, edge stitching each strip. I did not fold under and stitch, I opted instead to them raw so the would fuzz up a little after washing. For the patch pockets I used regular denim and grabbed a Clorox pen to draw on the stars. 


Lesson learned after above picture-put on the bleach gel thicker the first time, I had to do two applications because some were not visible.


I think the sizing was pretty spot on...or my guy was spot on her size chart! He is placed firmly in the size 5 which is what I made for him and it fit like it was made for him ((ha ha ha)). No modifications for the actual sizing were necessary; It is so nice when a pattern fits with no mods.


I think the shorts turned out great and I will surely be making again. I have plenty of bottom weights in my stash and think pants in kelly green will be made. It was 88 degrees out today so the pants are in the future! These were a easy sew and can definitely become a staple pattern. That being said I think that there are some things I would do differently. I LOVE the stripes but it made for a very thick faux fly. I would also always add the button/faux button hole on the waistband because it makes it look like real pants--not pull up pants. After a certain age I don't prefer the look of pull up pants but I still love the ease for them dressing and going potty. See the bottom of this post for my how-to on the faux button hole on the waistband.


Overall, I like the pattern and will be doing them again. The printing was easy although I would highly recommend printing in color for the pattern portion. It can get a little jumbled in black and white even with the very helpful different prints. I hate to print in color because I like to preserve the expensive ink but trust me; go for color!


So, Make sure you take the time to go to Stitch it Now and find out how to purchase your own pair of Run Jump Hop Skip Shorts/Pants. While you are there make sure you enter the giveaway! There's a chanceto win your own copy of the pattern, a fabric gift card or your choice of wither boy or girl inspired Japanese Echino fabrics!!

**Although the actual tour has been cancelled, Stitch it now is still having the giveaway. **

 photo 92050c1f-07eb-4b59-92b7-d2175f6055ed_zpsa8b03590.jpg


P

  • Faux Button Hole Tutorial

  • I marked on the waist band where I wanted it and folded over the faux fly so it was not as thick. Then you just use your button hole attachment and put it in but dont cut open the button hole. Then I stitched on a button over the faux button hole and all the layers of the waistband.


  • So starting off with my faker waistband after stitching the faux fly. Press your waistband down and mark where you want your button hole.
  • Then you select your button hole style, I always suggest testing it out on a scrap of fabric first.


Then you put the faux fly open, notice the pressed lines to the left of the needle in the picture above.

After that you can stitch down your waist band like normal.


Then you can stitch on button! 
Yay your done!!!!


 *** I was given this pattern for free in exchange for testing, but all opinions are my own. ***


Monday, May 5, 2014

Mulberry Tunic

So I bought a few pieces of the Wanderlust patterns from Willow & Co. Patterns.

My first pattern that I made up was the 

Mulberry Tunic


I loved the look of it :
 Many options (long/short sleeve, hood, inseam pockets or not, easy to color-block)
Not constrictive to wear-perfect for those hot summer days!
Big size range-from 18 mo- 12 years!

Anyhow here is my version


I decided to color/print block it. 
H picked out the comic book print at JoAnn's and I knew just what to make with it!
Also used Kona for the solid.
 (I don't remember the exact name for the yellow sorry!)

This pattern does come with a piece to put on a pocket on the left chest. 
I left it off so that it wouldn't obstruct the comic book print.


Just look at those inseam pockets!
Her instructions for this are perfect and easy to follow!

(he **might** be fishing for the skittles I put in his pocket...)


I love the little tab and green buttons.
Betcha didn't even notice all the green buttons on the front are DIFFERENT. 
Ha-Made ya look! 
I did not have enough of any one button so I just picked 5 that were the same size.

I think he's up to something with this look...


I (or course) bought a couple of other patterns from the Wanderlust line 
and will be making those up in the future so keep an eye out!

Saturday, May 3, 2014

Julia Cardigan and #SSW


So this past week was selfish sewing week over at imaginegnats. 
I decided to take part and do up a Julia Cardigan. 

I know by now EVERYONE and their Mother has made a Julia. 


---BUT---


If you haven't -- I highly recommend the pattern by Mouse House Creations,
which you can find over on her ETSY page.

Anyhow I had to dodge the rain clouds ((like ALL week))
so you will have to pardon me cutting out my no-makeup face ha! 
My hair was still only half dry too but hey, ya gotta do what ya gotta do.


Friday, January 10, 2014

Post Christmas Mayhem and Preparing for KCW!


So in the end of the Christmas craziness I made 9...no 10 pairs of the hanging dishtowels I posted about in the last post for a lot of different people. They were a great easy gift that I think was very useful for the recipients.


We took the little man to the Trolley Museum for a trolley ride with Santa.


Safe to say he loved it. They had a large train table and a large lego town display. He had cookies and hot chocolate after seeing Santa.
The trolley itself was just amazing, all restored and had wicker/woven seats and polished brass and wood everywhere. Very cool.
How about the guy in the last picture photo-bombing??
 
 
Now who is getting ready for KCW (KidsClothesWeek) at the end of the month?
I know I'll never get everything done I hope (wishes and dreams, amiright?) but I have high hopes.
Im getting ready now by prewashing all my fabrics. I'm pretty sure my serger was smoking by the end of serging over 20 yards of fabric. I need to get that thing actually serviced I think. I've never done it before so I don't even know where to take it!
 
I've picked out I think 6-7 patterns too. I know on my list is the recess raglan, another pair of skinny jeans, hipster Henley, nowhere man pants, multiple lazy day pajamas sets, the reversible zippy hoodie pattern and maybe if I get to it some more flannel pajama pants for my little mans Cabbage Patch doll. I made my own pattern for those and with scraps from his lazy days they are pretty
easy to whip up. What is on your list? What are you planning on doing? 

Sunday, October 20, 2013

Kids Clothes Week Fall 2013

kid's clothes week


It's that time of year again...


and this time I'm better prepared and

 **hopefully**

I'm being more realistic than the last go-round.


Last time I had high hopes and thought I could get ALOT more done than was actually possible working my day job and being a mom AND getting a lot of sewing in as well.
 
This time I have hopes of making just 4 things; and I've already prewashed my fabrics and I've already measured the monster and traced my patterns onto exam table paper (like at the Dr's office).
 
My plans are to make the:
 
Can ya guess I totally caved and bought the SewFab pattern bundle??
Also FYI- the Melly Sews Sleepy robe is a free download!


Friday, October 18, 2013

The Dinosaur Vest


 When your little man asks you to make something specific...
you do it. 


 (He probably won't be asking me forever)


Pattern Description: Children's and Boys' shirt, vest and pants. Shirt has long sleeves, side vents and patch pocket; vest has front zipper closure, patch pockets; pants have elastic waist casing, side seam pockets, cargo pockets and optional elastic at ankle.

Pattern Sizing:Children's sizes XS (3-4) S (5-6) and Boys M (7-8) L (10-12) XL (14-16)

Did it look like the photo/drawing on the pattern envelope once you were done sewing with it?It looks exactly like the pattern envelope with the exception of my zipper.

Were the instructions easy to follow? Incredibly so.


What did you particularly like or dislike about the pattern?
This pattern was very fast to start to finish which I liked. There really was nothing that I disliked.


Fabric Used:I used some remnant bin fleece from Joann's. The little man picked it out and asked me to make him something with it. I was happy to oblige of course. The little man is very opinionated and even picked out his zipper.


Pattern alterations or any design changes you made: I omitted the front facing and did an exposed zipper.


Would you sew it again? Would you recommend it to others?This is so very easy to sew and was very fast. It just takes an afternoon even with the little ones buggin' ya every thirty seconds. I already have plans for a sweatshirt one. 


The little guy loves it! As soon as he put it on he picked up his arms and said 


"RRAWRR"

Friday, October 4, 2013

Insa Skirt and a GIVEAWAY!!

Insa Skirt Review 


From the book
"Sew Clothes Kids Love"
By Sabine Pollehn and Nancy Langdon


This skirt I sewed up for my niece for her birthday. She is technically off the size chart for this book. However, with the elasticized waist and fuller skirt, it did not matter and made it a perfect fit for this fall birthday girl.  


Pattern Description: Four gore double layered skirt. Yoke with Elasticized waist.

Pattern Sizing: 86/92 - 134-140. Like I said above though, I sized it up for her.

Did it look like the photo/drawing on the pattern envelope once you were done sewing with it? Yes. There are so many variations and zing you can add on that no two skirts will look exactly alike though.

Were the instructions easy to follow? Yes. There was nothing that slowed me down.

What did you particularly like or dislike about the pattern? I really like that you can mix and match different fabrics and make it as over the top or subdued as you want. She is a little bit older and I thought would want a solid top and fun pop underskirt.


Fabric Used: The overskirt is a dark brown 21 wale cord and a green 21 wale with sparkles. The underskirt is randoms; 2 prints from Joann's and 2 from Hobby Lobby. As well as a burnt orange rick rack trim on the underskirt.

Pattern alterations or any design changes you made: I did not make changes really. I chose to add the vertical elastic gathering to the over skirt though.

Would you sew it again? Would you recommend it to others? Yes I would sew it again and I probably will for Christmas for my two new younger nieces. 


So I promised a giveaway for this book and here it is:


a Rafflecopter giveaway

Monday, September 30, 2013

Imke shirt review

Imke shirt

from the book
"Sewing Clothes Kids Love" by Sabine Pollehn and Nancy Langdon


Pattern Description: A really versatile t-shirt pattern that you can customize by piecing the sides, adding hood (2 styles), and using different sleeve length/styles.

Pattern Sizing: The book includes sizes 86/92 - 146/152. I made the 4 for my tall 3 year old son, even adding extra length to that. I hear they run small but I'm always cutting larger for him. Also you should note that these patterns from the book do not include seam allowances so if like me you know you need extra in the length you can just add some on really easily.

Did it look like the photo/drawing on the pattern envelope once you were done sewing with it? It did look like the pictures.

Were the instructions easy to follow? The instructions were very easy to follow.

What did you particularly like or dislike about the pattern? I like how you get a lot of bang for your buck with this book. Lots of different variations on each pattern. The only thing I dislike is, as always, light on the boys patterns. This one however can go either way.

Fabric Used: Cotton jersey; the main blue on this one was made with yardage that I miraculously found at Goodwill and the sleeve and hood I cut from a solid colored tee that I got on clearance.

Pattern alterations or any design changes you made: Other than the length I did not change anything. I chose the normal hood and short sleeved version.

Would you sew it again? Would you recommend it to others? I absolutely would recommend this to others. The little man already has a second shirt (same variation). As you can see from the photos though he was not sitting still for another shoot.

Conclusion: This pattern is great and I have already sewn another item from this book which I will be showing soon. 


I love this book so much and I know y'all will love it too soooo..


stay tuned and you will have the chance to win one.

Monday, July 15, 2013

Kids Clothes Week

Kids Clothes Week kicks off today!


I have a few patterns picked out at the fabrics to go with them--let's see how much I get done. 
It is a challenge for me to sit down and sew for just an hour a day so I like that this gives me a push to do it. Two days a week I work 11 hours a day + drive time home...Maybe I'll have to do 1/2 hour in the morning and 1/2 hour after??


This is my game plan:


McCall's M6502
Two pairs of these pants on the right with the tab sides.

One in dino fabric and the other in a 21 wale camoflage corduroy.

Also from this pattern one tan tee shirt.


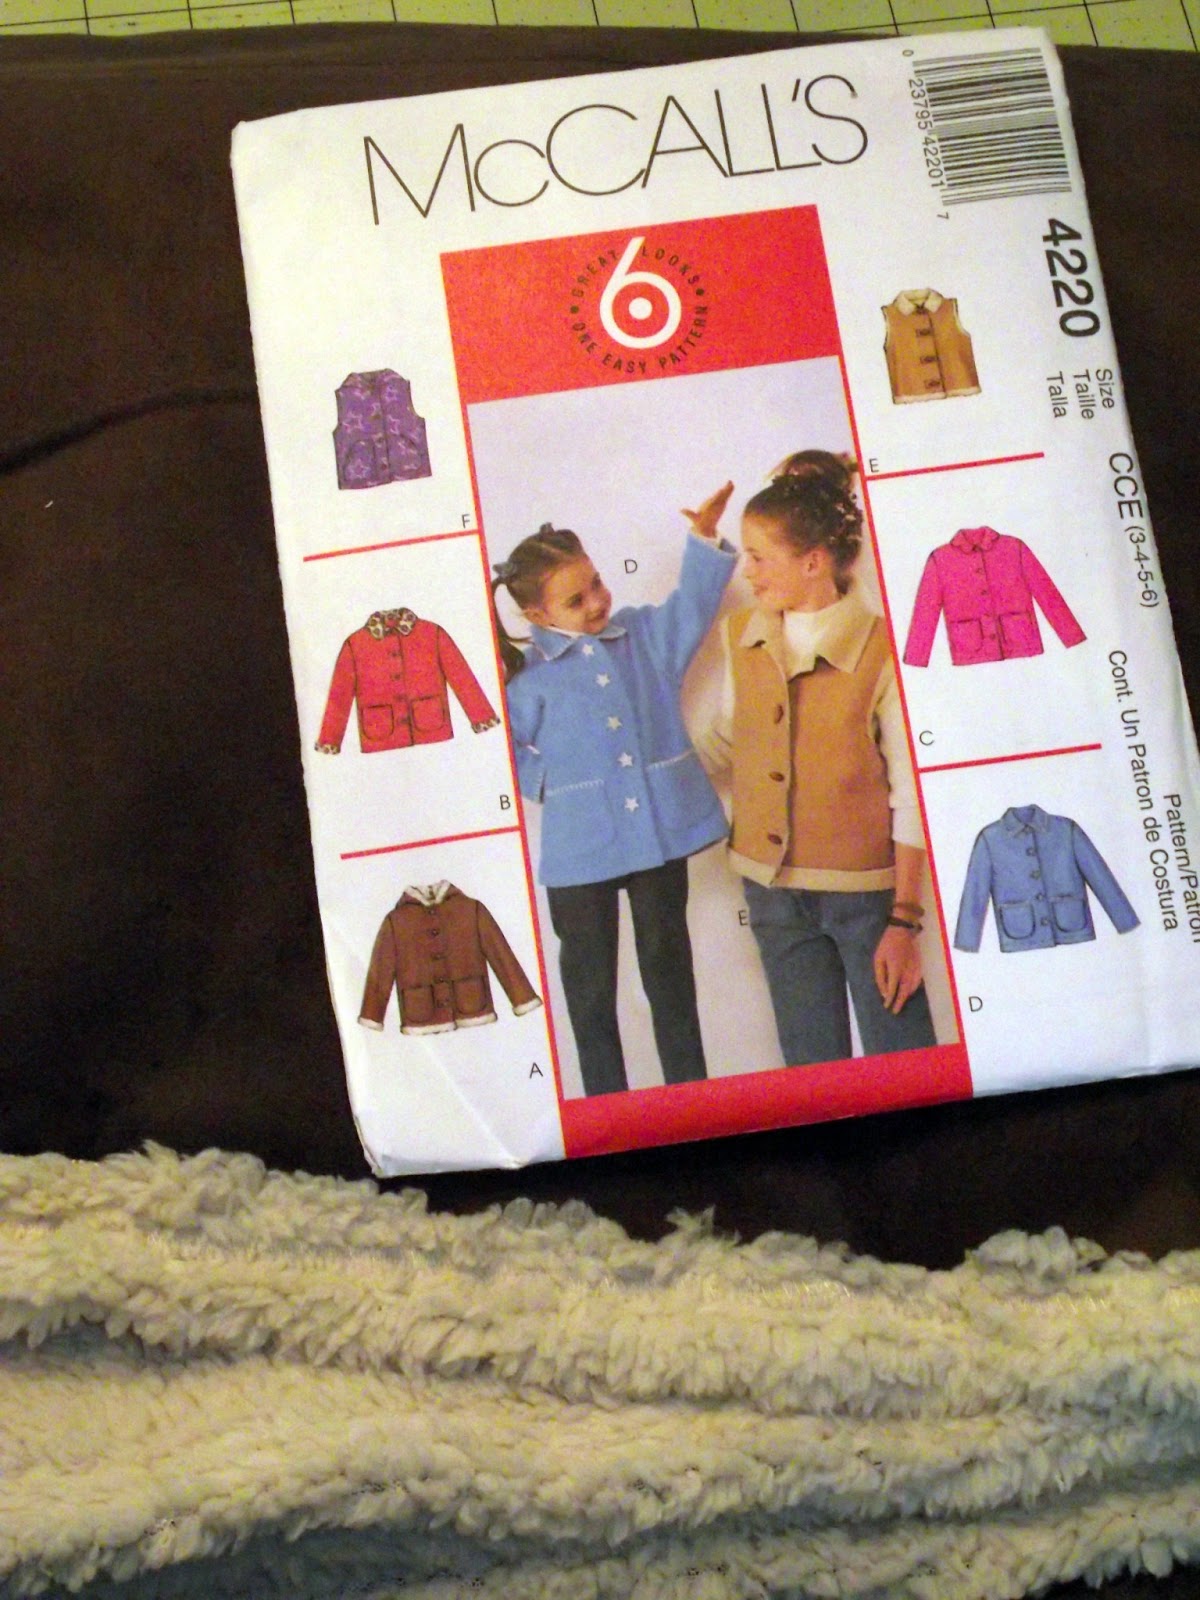
McCall's 4220

One style A jacket (the bottom left jacket with a hood)

in the faux shearling I got at for a STEAL a couple of years ago at a black friday sale.

This one I need some awesome wooden (or faux wood) toggles for the closure.


This vintage Simplicity 6863 from 1985 for my niece Azalea.
I want to do the one on the far right with the blue fabric being the top...maybe. It is a seersucker and I might switch it out tomorrow if I find something better at JoAnn's. I have a whopping 4 yards of the lower vintage fabric but I think it is WAY to busy to be both pieces.

I swear I had something VERY similar to this growing up!


Butterick B5585 for my nephew Eric-or as Hunter likes to call him "Baby Eric".

I think the only thing I might need for
this is some snaps.


Think you wanna join??

Go to KidsClothesWeek.com

Saturday, July 13, 2013

Vintage Overalls Pattern


So I mentioned this awesome old school pattern I got in my last post.

I finally got my computer back and can post again (BIG sigh of relief).


Pattern Description:

Boys overalls pattern from 1975 or so.


Pattern Sizing:

My pattern is for size 5-6.


Did it look like the photo/drawing on the pattern envelope once you were done sewing with it?

Yes. In all its vintage fabulousness.


Were the instructions easy to follow?

Very easy, hardly used them.

What did you particularly like or dislike about the pattern?

I love the classic look of these overalls. I like the funky shaped pockets and the trapezoid one on the bib!


Fabric Used:


 Thrifted 4x denim dress from the Goodwill.


Accented with Michael Miller Bot Camp.


Pattern alterations or any design changes you made:


The only thing I did different to this pattern was to hack them off at the knee's to make them shorts.


Would you sew it again? Would you recommend it to others?


I might...I would like to do a straight up engineer set with striped denim but I don't know if I will for sure. Maybe I should just do the engineer hat:)


I love love love the bot camp fabric so much! I used it once when the little man was small for a jon jon.  It was perfect for his first camping trip!


Hard to believe this little chubby cheeked guy just turned THREE a few days ago!!

Sunday, April 14, 2013

Apple Jacks


So I finally started cutting into my Moda Apple Jacks fabric. I love it so much and loved just looking at it; but I bought specifically for a little boy's quilt, so it had to be done. It is for my nephew Eric who is making his arrival sometime in June. I actually got mine from Fabricworm.com back when it was available everywhere...not so much anymore. 


Anyhow, I have been dying to make a bento box quilt so I am using this strip pieced method I found on QuiltsofLove.Blogspot . Her blog is chock full of great tutorials, pointers and tips so I highly recommend you check it out!


The best part about this quilt is that it only takes 27 2.5" strips of the solid and half a jelly roll (or 20 2.5" strips) for a 60x60 quilt. :) I have almost enough to make a second quilt! 


The only fabric you don't see here that I am using is the apple print I picked out with the aqua back ground. I think it will be perfect for the bias tape!


Thursday, April 4, 2013

Making PJ's from a Tee Shirt


So sometime last year we took the little man to a Pittsburgh Pirates game and it was a free t shirt game. Knowing that an Adult size Small would still be ginormous on the little guy I tossed it it my sewing room for refashioning at a later date...


Fast forward---> It is opening day of the 2013 Pirates Season this week, Hanrahan was traded long ago and Hunter could use some summer pj's soon.

Guess it is time to get to work huh?


Only cutting the front portion of the tee shirt cut out a tank style. You can free style like me or trace a tshirt that already fits your little one.
 
I originally drew a larger pattern but ended up cutting it smaller as shown in the black lines.
 
 
Then do a neat-o repeat-o and do the back portion cutting the neck a little higher than the front neckline.


Cut out a "U" shape in the crotch area, no need to make one smaller than the other like I did. I cut that portion out later too haha. Serge or stitch up the side seams and the shoulder with the right sides facing eachother.


Re-using the original t shirt sleeve cut off about 1/2" or so away from it. With the right sides together pin the tshirt hem to the pj sleeve opening. Sew along the closest to the raw edge original stitch line on the sleeve. Turn and topstitch.


Pick out the original neck line from the tshirt. and repeat for the neckline the same as you did for the sleeve. Cut an 1 1/2" strip of the tshirt and do a quickie hem on it. Apply to the crotch area, folding in half and topstitching. I did this in a similar method to applying bias tape if that helps. Seems I get too excited to finish at the end to take pictures. Then I applied regular snaps using my Dritz snap pliers.
I keep meaning to buy some of the Babyville ones to try them out but just haven't gotten around to it yet. I'm sure they would work just as well though.


Last step: Throw them on the little one and watch the hilarity ensue.


Apparently he felt like dancing!


Thursday, March 28, 2013

Another finish

Chiffon....

I'm so sorry but we can not be friends anymore.


I was recently asked to make a couple of costumes. I've already shared one and I thought I would share the other. The second costume is actually a underskirt to a costume dress she already owns.


They requested a chiffon or similar skirt to wear under this that would not look like a second piece. After some thought I decided to use a jersey knit and elastic waist to attach the chiffon to. I figured that way it will be stretchy at the hip/waist for movement. 


Then after some tricky pinning and trimming I hemmed the two layer of chiffon as one. This was to be used as a dance costume as well so it also had to have a slit because I was told she starts the dance on the floor.
I chose to make the slit on the same side as the one shoulder, seemed more balanced to me.


The reason chiffon and I can not be friends..she is a shady one. After all my careful laying out and trimming and hemming. Looked perfect day one. After hanging a day the chiffon relaxed and because I hemmed the two layers as one, one layer was longer than the other creating a bubble skirt look. Not cool Chiffon, not cool. Had to CAREFULLY unpick the offending hem and re-do it in one section.


This is the final result on the little star:


Sunday, March 24, 2013

Oh Toodles!

How to make a toodle belt


I don't know about you guys, but my little guy is in love with the Mickey Mouse Club House.

So much so that he does not call the plastic craftsman tools on his work bench "tools" but toodles. The other day the little man requested a "toodle-belt" for his toodles. So I happily obliged.


I had some flour sack towels laying around that I thought would be perfect. I figured I share a quick and dirty tutorial on making a toodle belt. No flour sacks? No problem use some scrap canvas, jean or home decor fabric. Just be sure it is wide enough to cross the waist of the little fella (or girl!).