Showing posts with label undergarments. Show all posts

Thursday, April 4, 2013

Making PJ's from a Tee Shirt


So sometime last year we took the little man to a Pittsburgh Pirates game and it was a free t shirt game. Knowing that an Adult size Small would still be ginormous on the little guy I tossed it it my sewing room for refashioning at a later date...


Fast forward---> It is opening day of the 2013 Pirates Season this week, Hanrahan was traded long ago and Hunter could use some summer pj's soon.

Guess it is time to get to work huh?


Only cutting the front portion of the tee shirt cut out a tank style. You can free style like me or trace a tshirt that already fits your little one.
 
I originally drew a larger pattern but ended up cutting it smaller as shown in the black lines.
 
 
Then do a neat-o repeat-o and do the back portion cutting the neck a little higher than the front neckline.


Cut out a "U" shape in the crotch area, no need to make one smaller than the other like I did. I cut that portion out later too haha. Serge or stitch up the side seams and the shoulder with the right sides facing eachother.


Re-using the original t shirt sleeve cut off about 1/2" or so away from it. With the right sides together pin the tshirt hem to the pj sleeve opening. Sew along the closest to the raw edge original stitch line on the sleeve. Turn and topstitch.


Pick out the original neck line from the tshirt. and repeat for the neckline the same as you did for the sleeve. Cut an 1 1/2" strip of the tshirt and do a quickie hem on it. Apply to the crotch area, folding in half and topstitching. I did this in a similar method to applying bias tape if that helps. Seems I get too excited to finish at the end to take pictures. Then I applied regular snaps using my Dritz snap pliers.
I keep meaning to buy some of the Babyville ones to try them out but just haven't gotten around to it yet. I'm sure they would work just as well though.


Last step: Throw them on the little one and watch the hilarity ensue.


Apparently he felt like dancing!


Tuesday, October 9, 2012

Ever have one (or two) of those days?

Ugghhh!

So between the regular job and the home/family time I just DO NOT feel like sewing.

I know tomorrow or the next day I'll get back in the swing of things. I have my pattern pieces traced for my undershirt for my Halloween costume ready to go-ready for placement and cutting so I know once I actually sit down I'll knock it out. 

I figured I would share my upcoming projects I wanted to do:) 

Who doesn't need some inspiration?

So the first thing I want to do is these boxer brief's that I found at Sew A Straight Line.  I feel like I say this a lot but it is another FABULOUS blog and you should totally check her out and poke around her blog.

 It never ceases to amaze me the talented bloggers out there


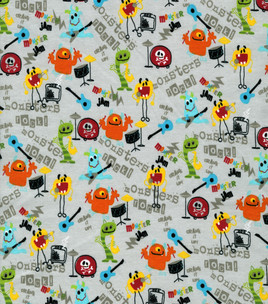
I want to do them in this fabric I got at Jo-Ann Fabrics.

Can I say I just love this fabric-totally "boy" but not baby-boy.

I'll probably make a matching long sleeve tee-shirt with this fabric too. Maybe a raglan sleeve in red? I did one one the motorcycle jacket and I love the retro-esque look:)


I also want to do somethings with thrifted sweaters now that it is getting chillier!

Like these mittens, pillows and wine bags (MAYBE all from the same couple of sweaters??)-


 Now to be honest...These are all pinned things in my Pinterest. It is redic sometimes there trying to chase down what blog or websites images come from. The mittens are some asian (japanese/chinese?) site, the wine bottles are from DIYCrafts which is apparently a invite only place (sorry again!), and the pillows are from schmath blog but it looks like it was inspiration for her too. So no original maker there. I would like to be able to give credit where credit is due but...I can't:(  

Anyhow it is Little Man's bed time and then it is mine!!


Friday, September 28, 2012

New and Improved Potty Trainers

 I know I've talked about my little man a bit. 

Today I want to talk about:

POTTY TRAINING!

Well, he is not ready to be honest, but I AM!

 I am so ready to be out of this diaper changing stage! I just made him some new and improved training pants made from Gerber's store bought ones so we are prepared. I know that I saw this on another blog but I'll be darned if I can't remember where. I'm 99% sure it was for a little girl though. As you know boys and girls need different...coverage. 

First the Supplies:


One gerber trainer
One FQ PUL
One FQ Flannel or other absorbent material
The Basics-Thread, scissors, sewing machine/serger


Check out the template for the flannel / PUL layers

HERE

I hope my link works! It's my first time haha

**When you print this out just make sure to match it up with your trainer to make sure it printed the right size. This was made to fit a 3T Trainer for a BOY, if you have a girl just fold down the side of the pattern marked "front" 1 1/2 inches.


Step One:


Fold over the flannel wide enough for the printed template and cut out.  I use three layers but I'll leave that up to you!
 
Yea that's right, living on the edge. No pins when I'm cutting my pattern peices.


 Repeat with one layer of PUL.


So now you should have this.


Step Two:

Pin all your layers together.
 Serge or zig zag the edges of all your layers together. 


Step Three:


Pin in place.
Now just a warning the trainer are rarely perfect. One side never seems to match the other when I know my pattern is even so just do your best here.


See? Same template different trainer. 

Only one out of three trainers actually was "right."


...or is the word "square"??


Step Four:


Stitch the flannel/PUL layers to the trainer within the serged edge.


And then you have: